Travel Selfies That Feel Like Memories, Not Performances: The Ultimate Guide to Photographing Yourself on the Road
You’re standing on a cliff above the sea. Wind in your hair, salt on your lips, a horizon so wide it feels like the world is breathing with you.
Your hand goes instinctively to your phone.
Do you take a selfie… or do you just stand there and feel it?
Here’s the secret: you can do both. Travel selfies don’t have to be shallow, staged, or dangerous. Done well, they become visual postcards from your future self to your present self—proof not just that you were there, but that you felt something there.
This is a deep dive into travel selfies that actually mean something: how to take them, how to stay safe, how to respect the places and people you’re visiting, and how to let those photos become part of your travel story instead of the main event.
Throughout this guide, we’ll weave together practical techniques, ethics, safety, and creative storytelling so that every time you flip your front camera, you know exactly what you’re doing—and why.
Table of Contents
1. Why Travel Selfies Matter More Than You Think
Scroll through your camera roll for a second.
How many of your favorite photos actually have you in them?
In a world where smartphones capture the vast majority of photos taken globally, and hundreds of millions of selfies are snapped every single day, it’s clear that self-photography has become part of the way people remember their lives. Travel is a huge slice of that.
Travel selfies are about more than your face
A good travel selfie can:
- Anchor a memory – You’ll remember how you felt in that rain-soaked market or on that empty morning beach, not just what the place looked like.
- Tell people who you are, not just where you went – Your expression, your clothes, your posture, your interaction with the scene all say something about your personality and mood.
- Create a visual diary – When you look back, you see a timeline of your growth: how you became braver, more relaxed, more curious, more yourself.
But there’s also a darker side:
- People push closer to cliffs, wild animals, and waves for “epic” shots.
- Crowds get blocked by one person doing endless takes.
- Museums and heritage sites are forced to ban selfie sticks because of damage risk and visitor safety.
- Some travelers choose destinations only because they photograph well and feel disappointed when reality doesn’t match the filtered grid.
So this guide is not just about how to take better travel selfies, but how to rethink your relationship with them:
What if your travel selfie was a conversation with the place, not a performance for the algorithm?
2. What Makes a Great Travel Selfie? (Hint: It’s Not Perfect Skin)
Before we get technical, let’s define what we’re aiming for.
When you imagine your ideal travel selfie, what do you see?
Is it your face front and center, or you as a small figure inside a huge landscape? Are you laughing with friends, or quietly reflective in a café window?
A great travel selfie usually does three things at once:
- Shows a sense of place
You can tell where you are—or at least what it feels like. The image isn’t just a cropped close-up; it includes texture: mountains, market stalls, neon lights, temple pillars, café tiles, or even the pattern of a train seat. - Captures an authentic emotion
Tired but satisfied after a long hike. Giddy in a theme park. Calm with a coffee at sunrise. The expression doesn’t have to be glamorous. Sometimes the story you’ll cherish most is the sweaty, messy, hilarious one. - Tells a mini-story
There’s a sense of before and after. Maybe your backpack straps are visible as you arrive in a new city, or your hair is wet from a sudden downpour, or there’s a half-eaten sandwich in the frame at a roadside stop. These details whisper:
“This is what the day really looked like.”
If you keep those three goals in mind—place, emotion, story—you’ll already be ahead of most travel selfies on the internet.
3. Planning Your Travel Selfies Before You Go
Yes, spontaneity is wonderful. But a little planning can mean the difference between rushed, awkward photos and travel selfies that look like a photographer followed you around all day.
3.1. Decide what you actually want to remember
Ask yourself a few questions before your trip:
- What kind of moments do I want to see myself in?
Hiking summits? Quiet café mornings? City nights? Street food stalls? - Do I prefer wide landscapes or intimate close-ups?
- Do I want more posed photos, or more candid, in-between moments?
Write down 3–5 types of travel selfies you want from this trip.
For example:
- “One sunrise shot, wherever I am.”
- “One selfie on a local bus or train.”
- “One meal shot where I look genuinely excited about the food.”
- “One photo of me with a landmark, but taken from a creative angle, not the standard postcard.”
Those tiny intentions help you notice opportunities when you’re on the road.
3.2. Research your locations like a photographer
Instead of just searching “things to do in X,” add a layer:
- Look up rooftop viewpoints, bridges, river walks, city walls, waterfront promenades, public parks, and free viewpoints.
- Check photos (without copying them blindly) to see:
- Where people are standing.
- What the light looks like at different times of day.
- How crowded it seems.
Ask yourself:
- If I take a travel selfie here, where will I stand without blocking others?
- Is there a safer, quieter vantage point that still captures the same landmark?
3.3. Think about time of day
Light changes everything.
- Early morning: softer light, fewer people, calmer moods. Ideal for wide, peaceful travel selfies.
- Late afternoon / golden hour: warm glow, flattering skin tones, long shadows. Perfect for romantic or dramatic shots.
- Midday: harsh overhead light. Use this for quirky, high-contrast photos or look for shade.
- Night: neon lights, street lamps, and reflections. Great for city energy, but you’ll need steadier hands, a wall to lean against, or a small tripod.
If you know you really want a selfie at a certain landmark, plan to pass by twice: once for the experience, once for the photo—or vice versa.
4. Gear for Travel Selfies: How Much Do You Actually Need?
Good news: you can create beautiful, meaningful travel selfies with nothing but a smartphone.
But if you like having tools, a few small items can make a big difference.
4.1. The phone in your pocket
Smartphones now capture the overwhelming majority of travel photos worldwide, and they’re getting better each year. You probably already carry:
- Wide and ultra-wide lenses – ideal for fitting your face and a big view in frame.
- Portrait modes – for softer backgrounds when you want the focus to be more on you.
- Night modes – for handheld low-light shots in cities, markets, or street festivals.
Make sure you:
- Turn on the highest resolution in your camera settings.
- Clean the lens regularly (front and back) with a soft cloth.
- Know where the lens is when you’re in selfie mode so you look at it, not at your own image.
4.2. Helpful accessories for travel selfies
You don’t need all of these, but consider:
- Compact tripod
A small, lightweight tripod or flexible “octopus” tripod can stand on a wall, rock, café table, or bench. Look for one that fits in a daypack side pocket and has a phone clamp. - Discreet remote shutter
A tiny Bluetooth remote lets you trigger photos from a distance without running back and forth. Combined with a tripod, it’s the closest you’ll get to having your own photographer. - Power bank
If you take a lot of photos, your battery will drain faster—especially in cold or hot conditions. A slim power bank is a quiet hero for selfie-takers and map-users alike. - Lens attachments (optional)
Clip-on wide or fisheye lenses can exaggerate perspective for playful travel selfies. Just make sure they don’t reduce image quality too much.
4.3. When to leave the gear behind
There are places where no selfie is worth the hassle:
- Crowded narrow streets during festivals.
- Small temples, shrines, or prayer halls.
- Wild areas where you need hands free for balance.
- Any place with clear “no photography” or “no selfie sticks” signage.
Sometimes the best choice is to skip the tripod, skip the stick, and just take one quick handheld selfie—or none at all.
5. Composition Basics for Travel Selfies That Don’t Look Like Everyone Else’s
You don’t need to be a professional photographer to compose a strong travel selfie. A few simple ideas will immediately lift your images.
5.1. Think in layers: foreground, you, background
Instead of floating in front of a bland sky, think of your selfie as a tiny stage with three layers:
- Foreground – railings, café tables, flowers, a wall, your backpack, a train window, a street sign.
- You – not always centered, not always huge. Sometimes just a silhouette or reflection.
- Background – mountains, skyline, sea, street, market, mural.
Ask yourself: What small object or detail can I include that instantly says something about this place? A local pastry, a bus handle, a patterned tile, a sign in the local language—these tell a richer story.
5.2. Play with the rule of thirds (and when to break it)
Turn on your phone’s grid lines. Imagine your frame divided into nine equal rectangles.
- Place your eyes near the top horizontal line.
- Put your face or body slightly on one of the vertical lines.
- Reserve the opposite side for the scene: a tower, a mountain, a street.
But don’t be afraid to break the rule:
- Center yourself in a symmetrical doorway or arch.
- Stand tiny at the bottom of the frame to emphasize the sky.
- Let your face fill the frame with just a hint of the scenery in the corner.
5.3. Use leading lines to guide the eye
Look for:
- Railings
- Staircases
- Paths
- Bridges
- Shorelines
- Rows of market stalls
Position yourself where those lines seem to point toward you or pass behind you. It adds depth and pulls the viewer into your world.
5.4. Work with light, not against it
Front light (sun behind the camera):
- Clear, bright face, but can look flat.
- Great for quick documentation shots.
Side light (sun from left or right):
- Adds shape and drama to your face and background.
- Lovely at golden hour and in alleys.
Backlight (sun behind you):
- Can create luminous, dreamy halos and silhouettes.
- Expose for your face by tapping it on-screen, or embrace the silhouette and let your features go dark for a storytelling effect.
If you’re in harsh midday light:
- Step into open shade: under an awning, in a doorway, or under a tree.
- Turn your face toward the brightest patch of sky rather than the sun itself for softer skin tones.
5.5. Reflections, shadows, and windows
Some of the most interesting travel selfies don’t look like traditional selfies at all:
- Your reflection in a train window, with the landscape sliding by.
- A puddle reflection in an old square after rain.
- Your shadow stretching across a tiled courtyard at sunset.
These images whisper rather than shout. They’re especially useful when you don’t feel like your face being the center of attention, but you still want your presence in the frame.
6. Solo Travel Selfies: How to Photograph Yourself Without Feeling Awkward (or Unsafe)
Solo travel and travel selfies are natural partners. When you don’t have a built-in photographer, you either learn to shoot yourself—or accept that you’ll always be behind the camera.
You can absolutely create high-quality, natural-looking travel selfies alone, without turning your trip into a photoshoot.
6.1. The three tools: timer, burst, and remote
- Self-timer (3–10 seconds)
Perfect when you can safely step a short distance away—like in a courtyard, quiet street, or wide viewpoint. - Burst mode
Combine timer + burst: set your phone to take several photos in quick succession after the countdown. Walk naturally, turn your head, adjust your hair—your real movements will give you candid options. - Remote shutter
Hide a small Bluetooth remote in your hand or pocket. Press it casually as you look around or lean on a railing. The result feels unscripted, even though you controlled the shot.
6.2. Where to put the camera
Get comfortable with improvising supports:
- Lean your phone against a water bottle, bag, or folded jacket.
- Wedge it into a windowsill or on a step.
- Use a compact tripod on a bench, low wall, or rock.
- Prop it in a café with a cup and sugar container.
Always test stability first.
If there’s even a small chance your phone might slide, fall, or be swept by a wave, find another angle.
6.3. How to pose without overthinking it
You don’t need a catalogue of influencer poses. Start with simple, relaxed variations:
- “Just arrived” stance – backpack on both shoulders, one foot slightly forward, looking up at a building or mountain.
- “In motion” – walking toward or away from the camera, looking to the side, coat or scarf moving.
- “Found a corner” – leaning lightly on a wall, crossing ankles, looking into or away from the lens.
- “Hands occupied” – holding coffee, map, hat, umbrella, handlebars, railings—this instantly relaxes your posture.
Try this trick: Set a 10-second timer and start doing something real. Zip your jacket, sip your drink, adjust your camera strap. The tiny in-between moments are often the most natural.
6.4. When (and how) to ask someone else to take the photo
Sometimes another human is the best “selfie tool.”
Look for:
- People who already have a camera in their hands.
- Fellow solo travelers, couples, or families.
- Travelers who seem patient and unhurried.
You can say:
“Hi! Could I ask you for one quick photo, the way I’m standing now, and then another with more of the background?”
Show them an example frame on your phone. Offer to photograph them in return. Keep it quick and low-pressure.
Avoid asking:
- People who are clearly busy or stressed.
- Staff in extremely crowded or rushed environments.
- Anyone who makes you feel uneasy.
6.5. Safety and situational awareness for solo selfie-takers
This is non-negotiable. No photo is worth:
- Slipping near water or cliffs.
- Turning your back on traffic or trains.
- Standing too close to wild animals.
- Leaving your bag unattended for “just a second.”
Before you set up:
- Scan the ground for loose rocks, wet patches, or sudden drops.
- Keep your bag in front of you or secured to something.
- If the place feels risky, treat that feeling as a hard stop, not a challenge.
A stunning travel selfie is worthless if you had to gamble your health or safety to get it.
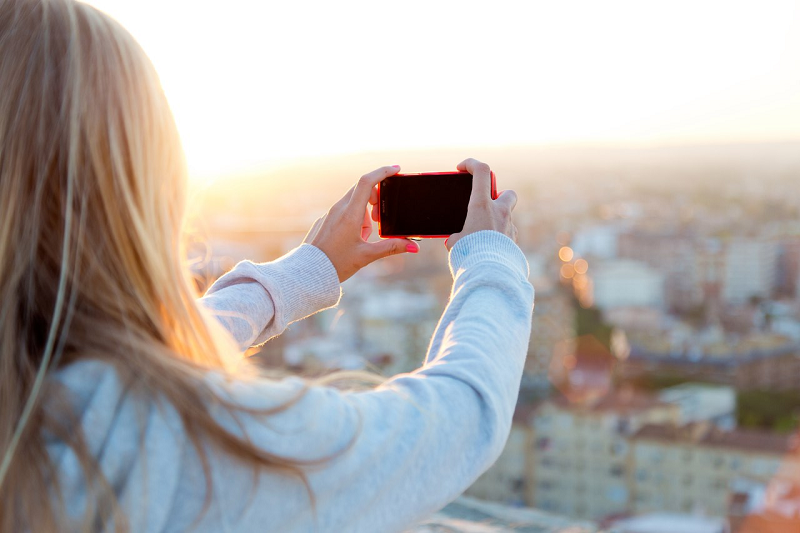
7. City Travel Selfies: Streets, Skylines, and Human Energy
Urban trips are fantastic playgrounds for travel selfies. You’re surrounded by architecture, signage, reflections, street art, and people living their everyday lives.
7.1. City backdrops that work brilliantly for travel selfies
Think beyond the main tourist square. Try:
- Side streets near famous landmarks – you still get the dome, tower, or skyline in the distance, but with fewer photobombers.
- Bridges and riverbanks – moving water, lights, and long lines make for dynamic backgrounds.
- Markets and food streets – neon signs, steam rising, colorful awnings, and your hands full of snacks.
- Public transport – trams, old trains, metro stations, ferry decks. Seats, windows, and doors can frame you beautifully.
- Rooftops and viewpoints – lookouts, bars with views, public terraces.
7.2. Dealing with crowds
Big cities mean people. Instead of fighting crowds:
- Embrace them – let the city blur behind you while you stay sharp.
- Shoot slightly from the side – step out of the main flow, face inward, and keep moving people as a soft backdrop.
- Go early or late – sunrise, just after opening time, or late at night for emptier shots.
When you are in a tight, busy space, keep your photo sequence short:
- Step to the side.
- Compose quickly.
- Take 3–5 shots.
- Move away.
7.3. Nighttime selfies in cities
City lights are magical, but low light is tricky.
Tips:
- Find pools of light: shop windows, street lamps, signs, food stalls.
- Stand facing the light source, or slightly to the side for more dimension.
- Rest your phone on something solid or use a tripod to avoid blur.
- Use night mode, but stay still during the exposure.
Try silhouettes too: stand between the camera and a bright sign or illuminated skyline. You become a story-shaped shadow.
8. Nature & Adventure Travel Selfies: Beauty Without the Risk
There’s a reason dramatic cliff and waterfall selfies flood social media—they look incredible. But those same places are where many injuries and deaths occur.
You can absolutely take memorable, wild-feeling travel selfies without flirting with danger.
8.1. Choosing safe spots
Before you step anywhere, ask:
- Is this surface stable, dry, and non-slippery?
- If I lost my balance right now, what would I fall onto?
- Is there a safe barrier I’m about to ignore?
Instead of standing at the edge, stand back and use composition tricks:
- Lower your camera and tilt it up slightly so the drop looks dramatic while you’re still safely away from it.
- Make yourself smaller in the frame to emphasize the scale of nature without going closer.
8.2. Water, waves, and waterfalls
Spectacular, but deceptive.
- Never turn your back on big waves to pose if you’re close to the waterline.
- Rocks near waterfalls and rivers are much more slippery than they look.
- Put your phone in a waterproof case if there’s heavy spray.
- Keep at least a few solid, dry steps between you and the edge of water—especially in unfamiliar places.
8.3. Wildlife and ethical distance
It’s tempting to get a selfie with a monkey, elk, deer, or elephant in the background. But wild animals are unpredictable, and many injuries occur when people step too close while focusing on their screens.
Safer alternatives:
- Use zoom or a longer lens rather than your feet.
- Let the animal be in the distance or side of the frame.
- Focus more on your reaction—a wide-eyed expression or smile—than on how close you can get.
Never feed or bait an animal for a selfie. If an area has clear rules about staying in vehicles or designated paths, those rules exist because someone got hurt or killed ignoring them.
8.4. Hiking, climbing, and cliff selfies
On mountain trails and cliffs:
- Take selfies only on stable, wide parts of the trail, not near edges.
- If your heart races at the thought of a misstep, that’s your body telling you this angle isn’t worth it.
- Keep at least one hand free when moving so you can catch yourself.
If you want a “dangling legs over the cliff” shot, consider:
- Finding a low rock or boulder where the drop is minimal but looks big from the camera angle.
- Sitting where there’s a wide landing below, not a sheer drop.
Your future self will be proud you prioritized staying alive over going viral.
9. Cultural Respect, Privacy & Selfie Etiquette Around the World
Travel selfies don’t happen in a vacuum. They happen in other people’s homes, streets, temples, shops, trains, and workplaces.
Taking yourself seriously as a traveler means taking other people’s boundaries seriously too.
9.1. Sacred and sensitive places
In religious sites, memorials, cemeteries, or areas of recent tragedy:
- Look for signs about photography. If in doubt, ask staff or follow what locals do.
- Even if selfies are allowed, consider whether one is appropriate.
- If other visitors are praying, grieving, or quietly reflecting, keep your phone away or take just one subtle shot, if any.
If you must capture yourself, try a low-key, respectful selfie:
- No big poses or exaggerated expressions.
- Dress and body language aligned with the place’s expectations.
- Taken quickly, without disturbing anyone.
9.2. Photographing locals and bystanders
When you take a travel selfie in a market, alley, or bus, other people may end up in your frame.
Questions to ask yourself:
- Would this feel intrusive if someone did the same to me in my hometown?
- Is anyone’s face clearly visible who might not want to be photographed?
Best practices:
- When someone is clearly recognizable and close, ask permission with a smile and gesture toward your camera. If they seem unsure, take that as a no.
- Avoid posting selfies that feature children, vulnerable people, or people in distress without explicit, informed consent.
- In some cultures, people are very relaxed about photography; in others, they may consider it a serious intrusion. When in doubt, err on the side of caution.
9.3. Selfie sticks, museums, and public spaces
Selfie sticks have been banned or restricted in many museums, galleries, sporting events, theme parks, and historic sites to protect both visitors and delicate objects. Even where they are allowed, thoughtful etiquette goes a long way.
A few simple principles:
- Never raise your selfie stick in a crowded indoor space where it might hit someone or bump an artwork.
- If there’s a line of people waiting for the same viewpoint, limit yourself to a handful of shots, then step aside.
- Don’t block paths, doors, or stairs for photos.
When you see a “no selfie stick” or “no tripods” sign, don’t treat it like a challenge. Folding your stick away and using your arm instead is a small price for being welcome in the space.
9.4. Over-tourism and the “same shot as everyone else”
Some places are overwhelmed by visitors seeking the exact same selfie angle seen on social media. Locals may struggle with noise, litter, blocked access, and unsafe behavior.
You can reduce your impact and still get amazing travel selfies:
- Visit at off-peak times if possible.
- Explore alternative streets, viewpoints, or nearby villages with similar beauty and fewer crowds.
- Celebrate lesser-known corners instead of adding another identical shot to a fragile viewpoint’s burden.
Your most memorable travel selfie might be from a quiet side street bench, not the famous overlook.
10. Editing Travel Selfies: Enhancing Reality, Not Erasing It
Once the picture is taken, the real magic often happens in editing—but it’s a double-edged sword.
10.1. A simple editing workflow
You don’t need advanced software to improve your travel selfies. Most built-in or free apps let you adjust:
- Exposure – brighten or darken.
- Contrast – add punch.
- Highlights & shadows – recover detail in skies or faces.
- White balance – fix color casts from yellow streetlights or blue shade.
- Sharpness & clarity – add a bit, but don’t overdo it.
A good rule:
Edit like you’re dressing a wound, not painting over it.
Enhance what’s already there instead of inventing a totally different scene.
10.2. Filters vs. your future memory
Heavy filters can be fun in the moment, but they may age quickly—visually and emotionally.
Ask yourself:
- When I look at this in ten years, do I want to see this exaggerated, smoothed-out version of myself?
- Does this color palette reflect the mood I actually felt, or just a trend?
Consider saving:
- One lightly edited version for your personal archive.
- A more stylized version if you enjoy posting that online.
10.3. Face and body edits: where’s your line?
Many apps can:
- Slim noses, jaws, and bodies.
- Enlarge eyes.
- Blur skin and erase lines.
Before using them, pause:
- Does this still look like me?
- Will this make me feel worse about my real face or body later?
Small tweaks for temporary blemishes can be understandable, but reshaping your entire appearance may feed insecurity—and also mislead people who meet you later.
Your travel selfies can be a powerful way to practice self-acceptance: messy hair, travel tiredness, sunburned nose and all.
11. Sharing Travel Selfies: Storytelling, Not Just Showing Off
Posting your travel selfies is where the private moment becomes public. You decide what that means—for you and for others.
11.1. How to choose what to share
You don’t have to post every good selfie. In fact, it’s often more impactful to share less, but with intention.
You might choose:
- 1–3 key selfies per destination that best represent your feelings there.
- A mix of:
- One “classic” landmark selfie.
- One candid, funny, or imperfect moment.
- One quiet, introspective shot.
Ask:
- If someone only saw these few photos, what would they think this trip was about for me?
11.2. Writing captions that add depth
You can use captions to go beyond “look at me”:
Instead of:
“Just another day in paradise 😎”
Try:
- “I almost didn’t come up here because the stairs looked endless. It turned out to be my favorite view of the whole trip.”
- “This market is loud, chaotic, and smells like ten different kinds of spice and grilled meat. I stood in this corner for a long time just listening.”
You don’t have to be poetic. Just honest.
11.3. Social media vs. being present
Studies and surveys often show that people rarely look back at most of their phone photos, while a small portion of images—printed, framed, or intentionally revisited—carry most of the emotional weight. Many travelers also report enjoying trips more when they spend less time curating content in real time.
A few boundaries you might try:
- No posting while at the location. Take your selfies, then share later from your room, a café, or after the trip.
- One posting window per day. Set aside 10–15 minutes in the evening if you want to share.
- Offline favorites. After the trip, choose a handful of travel selfies to print, put in an album, or save in a special folder.
The point is not to stop sharing, but to keep control of your attention so that taking travel selfies enhances your experience instead of swallowing it.
12. Real-World Scenarios: Travel Selfies You’ll Actually Want to Take
Let’s put this into practice with a few realistic scenes. Imagine yourself in each one—and picture the travel selfie you’d create.
12.1. Dawn in an old city
You’ve woken up early in a historic city. The streets are almost empty. Shutters are still closed; delivery vans hum in the distance.
How to approach your travel selfie:
- Find a side street with cobbles or patterned pavement leading toward a church tower or archway.
- Prop your phone on a windowsill or tripod at waist height.
- Use the rule of thirds: stand slightly to one side, leaving space for the street to “flow” behind you.
- Set a 10-second timer + burst mode.
- Start walking slowly toward the camera, looking around as if you’re genuinely exploring.
Result: a sequence of images with you in mid-step, soft morning light, and a quiet city waking up around you. No big pose—just presence.
12.2. Rainy afternoon in a museum
Outside, rain taps against the glass. Inside, the gallery is calm but not empty. There’s a sign: “No flash. No selfie sticks.”
Your move:
- Put away your stick and keep your phone in handheld mode.
- Choose an area with natural light from a skylight or window.
- Step to a corner where you’re not blocking any artwork.
- Hold your phone slightly below eye level and angle it so:
- Your face is on one side.
- A favorite sculpture or painting is softly in the background, not directly over your shoulder.
Set the timer to 3 seconds, bring the phone closer than usual, and let your expression be gentle, thoughtful. One or two shots, then pocket the phone and actually enjoy the art.
12.3. Street food market at night
Lanterns glow. Steam rises from grill stalls. Music and chatter fill the air.
To capture a vibrant travel selfie:
- Find a stall with interesting light—warm bulbs, neon signs, or flickering flames.
- Ask the vendor if they’re okay with you taking a quick photo with their stall in the background.
- Hold your food close to the camera with one hand and the phone slightly above eye level with the other.
- Turn your body a little sideways so the stall and other lights fill the background.
Let your expression be real: hungry, delighted, surprised at a new flavor. This is both a portrait of you and of the food culture you’re visiting.
12.4. Quiet afternoon on a train
You’re traveling between cities, sitting by a window. Fields roll past, or mountains, or coastline.
Try this:
- Clean your window and your camera lens.
- Switch to the rear camera if you can use a timer, for better quality.
- Prop the phone on the opposite seat or a bag, facing you and the window.
- Use a 10-second timer and turn back to look out of the window or down at your book as the shutter fires.
Or take a more abstract travel selfie: your reflection in the window, the landscape ghosting through your face. It’s a perfect visual metaphor for being between worlds.
12.5. Beach at golden hour
The sun is low. The sand is warm. Waves roll in with a soft hiss.
Instead of standing ankle-deep in the water facing the camera head-on:
- Place your phone low, near the sand, pointing slightly upward toward you and the sun.
- Stand a few meters back from the water, on dry, firm ground.
- Turn sideways so your profile catches the light, with the sun just out of frame to avoid harsh flare.
- Walk, turn, or laugh at something off-camera while the timer + burst captures the moment.
You’ll get silhouettes, semi-silhouettes, and glowing edges—travel selfies that feel like a memory rather than an advertisement.
13. Keeping Your Travel Selfies Safe, Organized, and Meaningful
Great photos are pointless if you lose them—or forget they exist.
13.1. Back up as you go
Consider:
- Automatic cloud backup when on Wi-Fi.
- A small external drive or USB stick you can plug into your phone.
- Periodic manual transfers to a laptop or tablet if you travel with one.
Make it a habit:
Every few days: back up. It takes minutes; losing your photos takes a heartbeat.
13.2. Make small albums, not endless dumps
After each leg of your trip:
- Create a “Favorites – City Name” album.
- Add:
- Your best travel selfies.
- A few detail shots (food, signs, interiors).
- One or two landscapes.
You’ll thank yourself later when you want to share, print, or reminisce without scrolling through thousands of similar images.
13.3. Print and write
Printed photos are surprisingly powerful:
- Choose 5–10 favorite travel selfies from the trip.
- Print them as small photos or a simple photo book.
- On the back of each print or in a notebook, write:
- Where you were.
- Who you were with (if anyone).
- One detail you can’t see in the photo—like a smell, a sound, or something someone said.
Now your travel selfies are not just images; they’re anchored stories.
14. The Travel Selfie Code: A Quick Checklist Before You Tap the Shutter
Before you take or post your next travel selfie, run through this mental checklist:
1. Safety
- Am I standing on stable ground, away from edges, vehicles, or waves?
- Am I keeping a safe distance from wildlife?
- Are my belongings secure and my surroundings under control?
2. Respect
- Am I in a place where photography is allowed and appropriate?
- Am I avoiding filming people who might not want to be photographed?
- Am I taking up more space or time than is fair to others here?
3. Story
- What does this travel selfie say about this place and this moment?
- Does my expression and body language match the real feeling I have?
- Is there a detail I can include—food, ticket, sign, shadow—to make this more personal?
4. Presence
- Am I taking this selfie to remember something, or just to prove something?
- Will I still like this photo in ten years, not just today?
- Can I put my phone away for a while after this and just be here?
If your answers feel good, take the photo. Maybe take two or three. Then put your phone away and let the experience continue.
15. Final Thoughts: Travel Selfies as Love Letters to Your Future Self
One day, long after the trip is over, you’ll stumble across a photo: your hair blown sideways by mountain wind, a coffee cup warming your hands on a cold city morning, your shoes dusty after a long walk in a foreign town.
You won’t care how many likes it got.
You’ll care whether it feels true.
That’s the real goal of travel selfies—not perfection, not performance, but truthful little windows into who you were, where you were, and how the world met you that day.
So on your next journey:
- Use your camera with intention.
- Treat places and people with respect.
- Keep yourself safe.
- Let your travel selfies be part of the story, not the whole story.
And when you lift your phone to your face and see your reflection hovering over a new landscape, remember:
You’re not just taking a photo of you in front of somewhere. You’re capturing you becoming someone.
References
- Passport Photo Online – “Mobile Photography Trends and Stats 2025”
https://passport-photo.online/blog/mobile-photography-trends-and-stats/ - PhotoAid – “Top Mobile Photography Statistics”
https://photoaid.com/blog/mobile-photography-statistics/ - Digital Camera World – “Only 7.5% of photos are taken with cameras – phones now rule photography”
https://www.digitalcameraworld.com/news/rip-cameras-925-of-photos-are-now-taken-with-smartphones - UNSW Newsroom – “Trampling plants, damaging rock art, risking your life: taking selfies in nature has serious consequences”
https://www.unsw.edu.au/newsroom/news/2023/08/trampling-plants–damaging-rock-art–risking-your-life–taking-s - Weiler, B. et al. – “Selfies to die for: A review of research on self-photography, risk and tourism”
https://www.sciencedirect.com/science/article/abs/pii/S2211973620301458 - National Park Service (U.S.) – “Keep Safety in the Picture”
https://www.nps.gov/articles/safepicture.htm - MakeMyTrip – “Selfie Safety Tips: How to Take Selfies Safely”
https://www.makemytrip.com/tripideas/blog/selfie-safety-tips - Travelers United – “Three rules for avoiding death by selfie photography while traveling”
https://www.travelersunited.org/three-rules-for-avoiding-death-by-selfie-photography-while-traveling/ - TravelManagers Australia – “The etiquette of using selfie sticks whilst travelling”
https://www.travelmanagers.com.au/ptm/NicoleEdgar/blog/etiquette-using-selfie-sticks-whilst-travelling/ - The Guardian – “Smithsonian Institution bans selfie sticks ‘to protect visitors and objects’”
https://www.theguardian.com/culture/2015/mar/04/smithsonian-institution-bans-selfie-sticks-to-protect-visitors-and-objects - Archaeological Survey of India – “Guidelines for Photography Permission in ASI Site Museums” (Lok Sabha Unstarred Question 2490 PDF)
https://sansad.in/getFile/loksabhaquestions/annex/12/AU2490.pdf - Rooted Storytelling – “Selfie Culture and the Overtourism Problem”
https://rootedstorytelling.com/rethinking-tourism/overtourism-solution-photography-ban/ - New York Post / Full Frame Insurance – “Gen Z picks travel destinations based on hot locals and aesthetic backdrops for selfies, study says”
https://nypost.com/2025/07/31/lifestyle/gen-z-picks-travel-destinations-based-on-hot-locals-and-aesthetic-backdrops-for-selfies-study-says/ - ExpressNews – “Why more Americans are choosing to travel solo in 2025”
https://www.expressnews.com/lifestyle/travel-outdoors/article/solo-travel-popularity-americans-2025-20357818.php - Haven / The Sun – “Photographs making a comeback in 2025 thanks to Gen Z”
https://www.thesun.co.uk/travel/33411125/photographs-comeback-gen-z-printing/

